Let’s talk about Installing new shingles over an existing asphalt shingle roof. It sounds like a shortcut to saving time and money, right? Well, it can be. But this move is more than just slapping on a new layer. You’ll learn how to check if your current roof is up for the challenge, weighing the good against the bad in terms of layering shingles.
Embarking on this journey, we’re meticulously analyzing which materials synergize optimally and unraveling the complexities behind why combining them could sometimes lead to less-than-ideal outcomes. Also, we’ve got you covered on getting your roof ready for its fresh coat—because yes, there’s special prep needed—and we’ll guide you through installing those new shingles so they last longer and protect better.
So buckle up; by sticking with us, you’re set to gain all the know-how needed for a durable and aesthetically pleasing roof update.
Evaluating Your Roof’s Condition Before Installing New Shingles
Deciding to layer new shingles over your existing roof is like choosing to paint over an old wall; it might look good for a while, but underlying issues could bubble up if you’re not careful. The key stats show that the existing asphalt shingles need to be near the end of their lifespan and lying flat. However, most roofs will not be suitable for a nail-over re-roof because they don’t meet these criteria.
Identifying Problem Areas
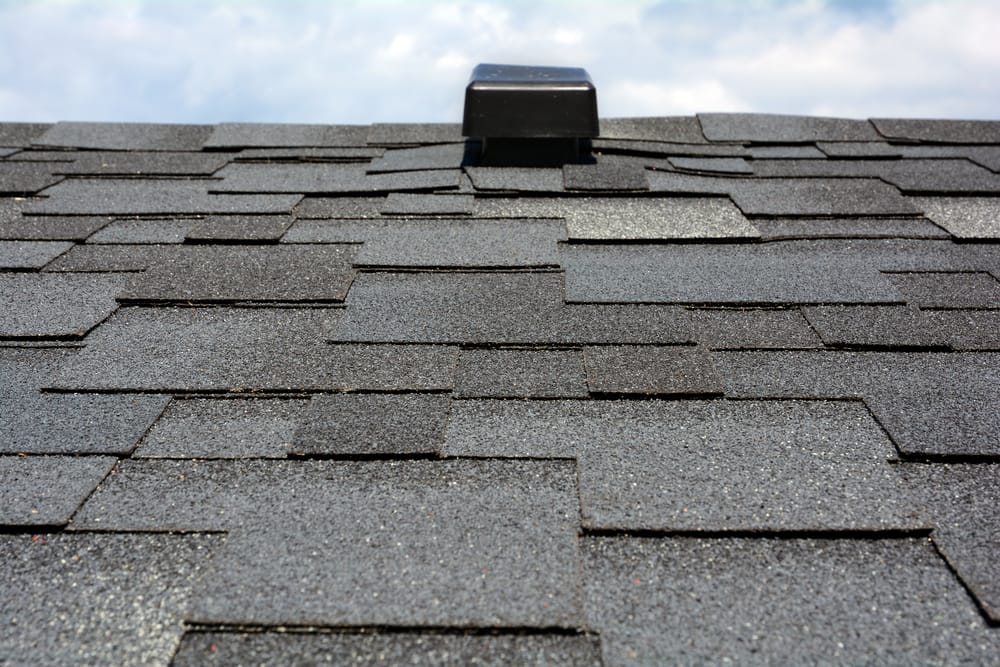
To ensure your roofing project starts on solid ground, first take a close look at your current situation. If your existing roof shingles are curling or missing in spots, this indicates deeper issues such as poor ventilation or water damage underneath. These damaged areas compromise the integrity of any new layers added on top.
Ensuring the whole roof surface is evenly flat stands as another pivotal point of consideration. This means no significant dips or bumps across the expanse which can cause uneven wear on newly installed shingles and lead to potential leaks. Also important is ensuring there’s no moss or algae growth, as these can hold moisture against the roof material causing rot.
The idea here isn’t just about slapping on some new materials hoping for an easy fix; it’s about making sure you’re building on a sound foundation—or in this case—a stable existing layer of roofing materials. And yes, while examining every inch of your rooftop may not be everyone’s idea of fun Saturday activity—trust me—it beats dealing with unexpected leaks during Sunday night football.
Before even thinking about adding those shiny new asphalt singles designed specifically for durability and aesthetics (because let’s face it – we all want our homes looking sharp), getting familiar with local building codes becomes essential too since they vary greatly by location according to International Association of Certified Home Inspectors. For instance, many states only allow two layers of roofing materials due primarily fire safety reasons; something worth noting before planning any further steps towards enhancing that curb appeal.
So why bother evaluating? Because knowing what lurks beneath helps prevent future headaches—and potentially saves money down line from unnecessary repairs caused by overlooked problem areas today.
Before layering new shingles, inspect your roof closely. Check for curling or missing shingles, uneven surfaces, and moss growth to avoid future leaks and repairs. Also, know your local building codes regarding roofing layers for a smooth project.
The Pros and Cons of Layering Shingles
On one hand, the allure of saving money and time is strong. But on the other, potential long-term issues loom. Diving into this decision unveils its true impact on your life.
Evaluating Your Roof’s Condition Before Installing New Shingles
If your existing asphalt shingles are near their lifespan end but still lie flat, you might think you’ve hit the jackpot for a nail-over re-roof project. However, it’s not always that simple. Most roofs won’t be suitable for this shortcut because underlying damage or wear isn’t always visible from the surface.
Identifying problem areas in your current roofing is crucial before making any decisions. Damaged areas compromise not just aesthetics but also functionality, potentially leading to bigger headaches down the road if ignored.
The Pros and Cons of Layering Shingles
An obvious benefit to installing new shingles over an existing layer is cost-effectiveness; less labor and fewer materials needed upfront mean more money stays in your pocket initially. However, there are significant drawbacks too. For starters, building codes in most states only allow up to 2 layers of shingles primarily due to fire safety reasons which limit this option right off the bat.
Beyond legal restrictions, finding and repairing roof leaks becomes exponentially harder with multiple layers, as does ensuring proper ventilation – vital for preventing ice dams in colder climates.
Choosing The Right Materials For Your Roof
Mixing different types of roofing materials sounds innovative but often leads astray from good outcomes – especially when upgrading from 3-tab to architectural shingles without removing old ones first could result in a lumpy appearance no homeowner desires.
Preparing Your Roof For New Shingles
Removing ridge caps along with broken or damaged pieces seems straightforward enough yet plays into how well prepared your roof truly is for another set. Special prep work such as ensuring no rotten decking lies beneath cannot be overlooked; failing here undermines everything else done afterwards.
Layering new shingles over old ones saves money and time, but it’s not always the best choice. Check your roof first for hidden damage, consider building codes, and prep thoroughly to avoid future problems.
Choosing the Right Materials for Your Roof
Mixing Materials: A Good Idea?
When you’re planning a roof overhaul, one burning question might be whether to mix materials like asphalt shingles with others during installation. In the realm of roofing, asphalt shingles reign supreme for their blend of affordability and resilience. But sometimes, the heart wants what it wants, maybe cedar shakes or dimensional shingles for that aesthetic edge.
However, before you start laying asphalt shingles alongside more exotic options, consider this: Upgrading from 3-tab shingles to architectural (dimensional) ones can result in a lumpy appearance if not done correctly. This is because dimensional shingles are thicker and designed with various shapes and sizes which can create unevenness when combined with thinner types of roofing materials.
This doesn’t mean your dream of a mixed-material roof is dashed; it just means some extra thought needs to go into the prep work. Understanding how these materials interact is crucial. For instance, while mixing composition shingles with something like cedar shakes could give your home an enviable look on paper, in practice it requires meticulous installation techniques to prevent issues such as moisture intrusion or uneven wear over time.
To navigate these waters successfully, expert advice from a roofing contractor is essential—not only will they help ensure compatibility between different material types but also make sure everything complies with local building codes.
Speaking of codes—did you know most states cap the number of allowable layers at two? This rule primarily addresses fire safety concerns but also hints at another layer-related issue: finding and repairing leaks becomes exponentially harder when sifting through multiple layers. Local building regulations should always guide your decisions around installing new versus replacing old roofing material entirely.
In summary, while mixing roofing materials offers an opportunity for creativity and potentially enhanced curb appeal, it’s not without its challenges. Proper research paired with professional guidance ensures that both aesthetics and functionality meet high standards – resulting in a durable roof that looks exactly how you envisioned.
Thinking of mixing roofing materials? While it boosts curb appeal, remember the challenges. Thicker shingles need careful installation to avoid lumps and ensure even wear. Always check local codes on layer limits for safety and ease of repairs. Professional advice is key to getting that dream look without compromising durability.
Preparing Your Roof for New Shingles
Removing Ridge Caps and Broken Shingles
The journey to a fresh, sturdy roof begins with some special prep work. This means rolling up your sleeves and getting rid of any obstructions that stand in the way of smooth installation. Think of it as prepping your canvas before you start painting; only this time, your masterpiece is a leak-proof roof.
First on the agenda is removing ridge caps. These are like the crown jewels of your roof but can be quite pesky when laying down new shingles. With care and precision (and maybe a little elbow grease), pry these off to ensure nothing hinders the flat surface needed for new materials.
Next up: broken shingles – every roofer’s nemesis. Broken or damaged shingles create an uneven base which could lead to bigger problems down the road like leaks or further damage during heavy storms. Plus, remember that rotten or compromised decking cannot be replaced without clearing away old layers first – another crucial reason why starting with a clean slate matters.
Ensuring a flat and unblemished surface is not merely for aesthetic appeal; it plays a pivotal role in the successful setup and enduring resilience of your roof. That means ensuring each section is ready to lay flat against its counterparts without bumps or gaps where moisture might sneak through. Experts meticulously assess and prepare the surface, guaranteeing a flawless setup that prevents future complications.
Laying new asphalt over existing layers seems like an obvious benefit because you save money on removal costs, right? But let’s not forget what we’re dealing with here: If there’s even one problem area underneath, chances are high it will come back to haunt you later—a scary thought indeed.
If after reading all this you’re thinking “I got this,” great. You’re on track for what could potentially save some cash while giving your home that much-needed facelift. However, keep in mind local building codes often have strict rules about layering roofs—most allow no more than two layers—for good reasons related to fire safety and structural integrity. Check out local regulations here. It pays (literally) to do things by the book from step one.
Start by removing ridge caps and any broken shingles to create a smooth base for new ones. This step is key for a durable, leak-proof roof. Always check local codes since most places limit you to two layers of roofing.
Installation Techniques for a Durable Roof
Installing Flashing and Air Vents Correctly
Ensuring your roof remains leak-free hinges on the meticulous setup of both flashing and air vents, a step not to be overlooked. Start by installing step flashing along side walls, which involves laying a piece of flashing under each shingle as you go up the roof. By adopting this method, we guarantee that water is deflected off the wall and redirected onto the shingle topside, a crucial step in safeguarding your home from moisture damage. Valley flashing requires careful attention too; it must be wide enough to handle heavy rain and properly secured to avoid any water intrusion.
Air vents play a significant role in maintaining your roof’s longevity by regulating attic temperatures to prevent ice dams during winter months. Make sure each vent has a rubber boot seal around its base to keep moisture out. Driving nails correctly—just below the tab slots on asphalt shingles—prevents future leaks around these vulnerable areas.
Laying Asphalt Shingles with Precision
The foundation of an enduring roof lies in how well you lay down those first few rows of asphalt shingles—the starter strip is everything here. By ensuring this initial course is perfectly straight, you set yourself up for success across your entire roofing project. A handy tip: use chalk lines as guides before driving nails into place, about 6 inches apart along each row.
Next comes mastering valley installations where two sections meet at angles—a notorious spot for leaks if not handled right. Here’s where cutting asphalt shingles precisely becomes essential; trim them so they fit snugly against one another without gaps but also allow room for expansion during hot weather when materials can swell slightly.
Focusing on these details makes all the difference between having just another good-looking roof versus one that stands strong against Mother Nature’s tantrums year after year.
Master the art of installing flashing and air vents correctly to prevent leaks, and lay asphalt shingles with precision for a roof that not only looks good but lasts. Paying attention to these details can save you from future headaches.
Enhancing Your Roof’s Aesthetics and Functionality
Cutting Shingles for a Perfect Fit
When it comes to giving your roof that polished look while also boosting its functionality, precision is key. One of the first steps in achieving this is cutting shingles for a perfect fit, especially around complex areas like ridge caps. Using a utility knife ensures clean cuts that not only enhance the appearance but also contribute to better performance against elements like wind and rain.
The technique involves measuring the area where the cut shingle will go and then carefully using the utility knife to trim it down to size. It might sound simple, but getting those straight lines requires a steady hand and an eye for detail. Remember, uneven or poorly cut shingles can lead to gaps which water can penetrate, causing leaks.
Crafting ridge caps with precision is pivotal, as it not only elevates the roof’s look but also acts as a stalwart defense against water seepage at those susceptible junctures. These specialized shingles designed specifically for covering ridges add both aesthetic appeal and protection against leaks at these vulnerable points on your roof. By ensuring each piece fits snugly together without any overlap or gaps, you create a seamless barrier against moisture infiltration.
Yet despite our best efforts at maintenance, every homeowner knows roofs don’t last forever—but they sure can try with some TLC. When faced with replacing an aging layer of asphalt singles or installing brand new ones atop an existing structure (a move sometimes frowned upon due regulations limiting layers), consider how these materials interact aesthetically functionally within your home’s exterior design scheme before making final decisions about whether mix different types such as cedar shakes dimensional alternatives into project plans.
With so many options available today from traditional three-tab designs architectural styles offering enhanced durability style points alike; there truly has never been better time explore what works best given specific needs wants budget constraints course local building codes too.
Remember though: no matter which route decide take towards improving overall look efficiency roofing system itself always prioritize proper installation techniques beginning end process avoid potential issues down line related poor workmanship incorrect material choice improper ventilation setups could ultimately compromise integrity entire setup leave more susceptible damage over long periods continual exposure harsh weather conditions year round basis hence why investing little extra upfront during initial stages planning phase absolutely essential ensure get most bang buck moving forward future endeavors involving property improvement projects alike.
For a polished and functional roof, precise cutting of shingles is crucial. Use a utility knife for clean cuts around areas like ridge caps to boost appearance and performance against weather. Remember, precision prevents leaks by avoiding gaps.
Conclusion
So, installing new shingles over an existing asphalt shingle roof is a journey. You’ve learned to first assess your current roof’s condition, identifying any problem areas that might not make it suitable for another layer.
You weighed the pros and cons. Saving money and time stands out but remember, dealing with potential leaks gets trickier with more layers.
Choosing materials wisely matters too. Mixing different types can lead to issues down the line. And prep work? Ensuring everything is prepped properly plays a pivotal role in guaranteeing an installation that’s free from hiccups.
Finally, laying those new shingles correctly ensures longevity and beauty for your home’s top layer.
In all these steps, practicality was key; from assessing conditions to picking materials and executing the job well. Let this guide be your roadmap when you’re ready to tackle that roofing project head-on.