Imagine coming home to a puddle right in the middle of your living room. Not fun, right? This is where the importance of roof flashing comes into play. It’s like an unsung hero that keeps water at bay, protecting your house from leaks wherever the roof meets another surface. Embarking on this exploration, we’re about to unravel the essential knowledge every homeowner should possess regarding roof flashing, a guardian against water intrusion.
We’re going beyond just understanding its importance; you’ll get insights into different materials used and common types installed on homes today. Plus, we’ll cover when it’s time for a replacement and how regular maintenance can save you from unexpected indoor pools. Stick around to unlock these essentials of home improvement—knowledge that could literally keep a roof over your head.
The Importance of Roof Flashing in Home Improvement
Imagine your abode as a bastion safeguarding against the encroachment of water. The roof is its shield, and the flashing? That’s the unsung hero keeping water at bay from vulnerable areas. Every roof needs this critical component to prevent leaks where water can sneak in.
Rain doesn’t just fall straight down; it hits your roof at angles, driven by wind, and seeks entry points around chimneys, vents, and where different surfaces meet. This is where roof flashing steps in like a bouncer at a club door—directing rainwater away from these potential leak spots back onto the main surface of the roof or into gutters.
Protecting Vulnerable Areas from Water Damage
Vulnerable areas on your rooftop are prime targets for leaks without proper protection. Flashing acts as an extra layer between these danger zones—think edges of roofs (roof’s edge), around chimneys (step flashing), under shingles near walls (counter flashing step flashing), or even surrounding skylights—to keep everything dry underneath.
This isn’t about slapping on any metal strip you find lying around though; choosing durable materials like aluminum, steel, or copper ensures long-term defense against weather assaults. Steel might be king due to its blend of affordability and toughness but don’t count out copper for that touch of class plus resistance to corrosion over decades.
Common Types of Roof Flashing Materials
Diving deeper into materials shows us why not all metals are created equal when battling moisture intrusion:
- Aluminum: Lightweight yet strong enough to resist rust making it perfect for most climates especially those salty coastal air regions but watch out if you’re dealing with highly acidic conditions which could eat through it faster than expected.
- Copper: Offers aesthetics alongside durability presenting itself as an upscale option that naturally develops a protective patina over time combating harsh elements while adding character to your home’s exterior look.
Maintenance Tips for Roof Flashing
To make sure this silent guardian keeps doing its job effectively involves some upkeep work too because let’s face it, nothing lasts forever without a little TLC. Now then, regular inspections help catch issues early before they escalate ensuring seams stay sealed and fasteners remain tight so no surprise drips start decorating interior ceilings unexpectedly. Roofing contractors recommend giving them a call for annual checkups as the best way to ensure peace of mind knowing professionals have an eye on catching minor repairs before they turn into major headaches later down the road. So next time you hear rain tapping at your window, think with a grateful nod in the direction of that hardworking and unassuming piece of architecture known simply as ‘flashing’. It’s what continues to stand guard protecting your valuable investment day and night through changing seasons and years.
Roof flashing is your home’s silent guardian against water damage, channeling rain away from vulnerable spots like chimneys and edges. It needs regular checks and the right material choice—like durable steel or classy copper—to keep your fortress dry and safe.
Common Types of Roof Flashing Materials
Aluminum vs. Steel vs. Copper
In the realm of roofing, flashing acts like a superhero’s shield, guarding your home against water invasion at its most vulnerable points. But not all heroes wear capes; some come in aluminum, steel, or copper. These metals have taken center stage as the go-to materials for roof flashing due to their resilience and ability to ward off water damage.
Steel stands out as the MVP among them for being both tough and budget-friendly. Galvanized steel is especially favored for its robust defense against corrosion, securing a spot as a preferred option in numerous American households.
Copper takes on a more luxurious role in this trio. Yes, it might lean towards the pricier side but compensates with an aesthetic appeal that ages gracefully into a striking patina over time—not to mention its exceptional longevity which makes frequent replacements a thing of past eras.
Last but certainly not least is aluminum—lightweight yet strong and utterly resistant to corrosion by nature itself. This material has made waves mainly because it can be easily molded to fit intricate roof shapes and sizes while providing steadfast protection against leaks.
The Verdict on Flashing Material: What’s Best For Your Roof?
If you find yourself pondering over which metal would best suit your fortress (aka home), consider this: steel is your ally if durability within budget sounds appealing; however, should you wish for your abode to stand out aesthetically while ensuring top-notch longevity without minding the extra cost then copper will be worth every penny spent.
But let us not forget about our versatile friend aluminum – perfect for those seeking reliability without adding excessive weight atop their sanctuary under skies blue or grey.
For folks ready dive deeper into these materials’ specifics or perhaps seek professional advice tailored precisely towards individual needs – remember always there are seasoned experts eager lend hand. Here’s where professionals step in. They’ll make sure no stone goes unturned—or rather no shingle left unflashed—in safeguarding one’s humble abode from unwanted moisture.
With each option offering unique benefits along various dimensions such as cost-effectiveness aesthetics durability ease installation crucial weigh what matters most when deciding upon right kind flashing safeguard house turning dreamy dwelling nightmare plagued leakages structural damages caused improper weatherproofing efforts gone awry.
Choosing the right roof flashing material—be it durable and budget-friendly steel, aesthetically pleasing copper, or versatile aluminum—is key to protecting your home from water damage. Each has its unique perks concerning cost, appearance, durability, and installation ease. Don’t hesitate to consult with pros for tailored advice.
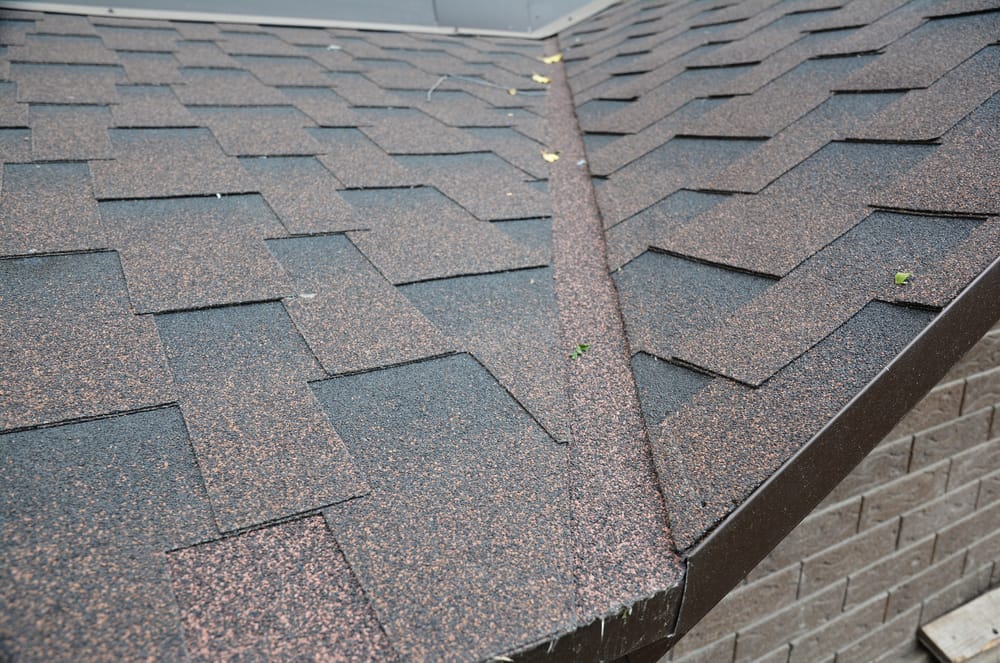
Key Types of Roof Flashing Explained
Step Flashing for Walls and Chimneys
Imagine your roof where it meets a wall or chimney. This is where step flashing comes into play, acting like a waterproof stairway that guides water away from these intersections. Constructed from rectangular slices interwoven with shingles, it serves as an additional barrier to thwart the intrusion of water. Each piece overlaps the one below by at least 2 inches, ensuring no water sneaks through as it runs down the roof surface.
The brilliance of step flashing lies in its simple yet effective design, which works seamlessly with the natural flow of water off your roof. Proper installation by a roofing professional is crucial because any misstep could lead to leaks that damage your home’s interior.
Counter Flashing Against Mortar Joints
Mortar joints on chimneys can be tricky spots for keeping out moisture. That’s where counter flashing steps up—literally stepping over step flashing to add another layer of defense. Installed directly into mortar joints or onto the brick itself, this type ensures no sneaky droplets find their way inside.
A unique aspect about counter flashing is how it complements existing flashings by covering them up and redirecting water even more efficiently off the structure’s sides. Ensuring both types are correctly installed will let you sleep soundly during heavy storms without worrying about indoor showers courtesy of Mother Nature.
Apron Flashing at the Base of Walls
If roofs had superheroes, apron flashing would be among them—especially when combatting rainwater at places where roofs meet vertical walls or sloped roof sections end abruptly against flat surfaces. This single piece stretches across these critical areas like an apron (thus its name), catching and directing water outward and away from vulnerable spots prone to leakage.
This superhero needs regular checks though; wear-and-tear can compromise its integrity over time making maintenance essential for continued effectiveness. Its durability depends heavily on material choice—with aluminum being lightweight yet sturdy enough for most homes whereas copper offers longevity plus aesthetic appeal albeit at higher cost. Steel strikes balance between cost-effectiveness and resilience making it popular choice among homeowners seeking reliable solution without breaking the bank.
In summary, the four common types – step, valley, counter, and open valley – each serve distinct purposes but all aim towards the same goal: protecting homes from dreaded leaks. Proper understanding and selection based on specific architectural features alongside professional installation are key to maximizing the benefits offered by each type. So next time you look up at your own house, remember the tiny soldiers standing guard day and night to ensure peace of mind regardless of what the weather forecast may bring.
Roof flashing acts as your home’s unsung hero, steering clear of leaks by guiding water away from critical areas. Whether it’s the step flashing’s layered defense, counter flashing’s mortar joint protection, or apron flashing’s wide coverage—each type plays a vital role. Proper selection and expert installation are crucial for peace of mind against the elements.
When to Replace Roof Flashing
Roof flashing might not be the star of the show when we talk about roofs, but it sure does play a crucial supporting role. Think of it as the unsung hero that keeps water from crashing your home improvement party.
Rust never sleeps, and neither should you when it comes to inspecting your roof’s flashing. Despite its durability surpassing many other roofing components, flashing isn’t exempt from the ravages of time and will eventually succumb. During a roof replacement is an ideal time to swap out old flashing for new, ensuring everything ages together gracefully and preventing future leaks.
Prevent Future Leaks by Timing Your Replacement Right
The best defense against water damage is a good offense – namely, proactive maintenance and timely replacement of your roof’s armor against elements: the flashing. While sturdy metals like aluminum or copper make this component extremely durable, they’re not immune to wear and tear caused by relentless weather conditions.
A common misconception is that if there are no visible signs of damage or leakage then everything must be fine up there on the rooftop ballet between shingles and sky. But here’s where being vigilant pays off; regular check-ups can reveal issues invisible from below—like corrosion hidden under overlapping pieces—or subtle shifts in alignment at critical junctures where different surfaces meet.
Making The Most Out Of A Roof Overhaul
If you’re already planning a major revamp with roof replacement, seize this opportunity to give your home’s defense system an upgrade with new flashing installation. Why? Because integrating this step into larger renovation projects ensures consistent aging among all components while minimizing disruption (and cost) down the line due to mismatched life spans between layers protecting your dwelling.
In conclusion, replacing old or damaged flashings during significant roofing work isn’t just smart—it’s essential. It aligns durability across all parts for uniform resistance against Mother Nature’s moods swings thus offering extra protection where needed most along edges penetration points prone leaking over time without proper attention given their pivotal roles keeping elements bay effectively safeguarding interior spaces beneath them against unwanted moisture intrusion leading potentially costly repairs if left unchecked long enough escalate serious problems demanding immediate action fix before further harm done structure itself overall stability compromised needlessly simply because overlooked initially thought unnecessary expense could avoided hindsight proves otherwise often case unfortunately learn hard way better safe than sorry motto live especially comes maintaining one biggest investments own house after all shelter basic human necessity worth investing ensure remains secure comfortable place call home years come.
“`
Rust never sleeps, and neither should you when checking your roof’s flashing. It’s key to replace it during a roof overhaul to prevent leaks and ensure everything ages well together. This proactive step is crucial for safeguarding your home against water damage.
Maintenance Tips for Roof Flashing
Keeping your roof flashing in tip-top shape is like making sure the armor on a knight has no chinks. It’s all about defending your castle, aka your home, from water’s sneaky attempts to infiltrate.
To kick things off, remember that regular maintenance inspections are not just recommended; they’re essential. These check-ups ensure the functionality and integrity of your roof flashing while preventing rusting – an enemy you don’t want gaining ground.
Spotting Signs of Trouble Early
Catching issues with your roof flashing before they escalate can save you time, money, and headaches. Look out for signs like lifting or missing pieces which could indicate it’s time for some repairs or possibly a replacement. Discoloration or rust spots are also red flags signaling that moisture may have breached the defenses.
If these symptoms appear, reaching out to a roofing contractor skilled in continuous flashing techniques might be necessary. An expert will determine if minor repairs suffice or if a more thorough intervention is required.
Installation Techniques for Different Flashing Types
Drip edge, base flashing, and edge flashing aren’t just fancy terms roofers throw around to sound important. These unsung heroes silently guard your dwelling from the onslaught of water infiltration. Every flashing variant plays a pivotal part in guiding water away from your roof’s vital spots, acting as an unseen shield.
Drip Edge Flashing Installation
Starting with the drip edge, this unsung hero sits at the very edge of your roof. Its job? To kick water off the roof and into the gutters like a skilled soccer player sending a ball downfield. Installing it requires precision – aligning it right along the edges of your roof deck before nailing it down securely.
This technique ensures that no sneaky droplets find their way underneath your shingles or tar paper. It’s all about giving rainwater one direction: out and away.
Base Flashing Methods
Moving on to base flashing – think of this as the reliable best friend who’s always got your back (or in this case, your chimney). For structures protruding from your roof like chimneys or skylights, base flashing provides an extra layer of protection where these elements meet the main surface area.
Crafting a waterproof barrier at these intersections is the key maneuver. Typically involving two layers; one that attaches directly to the object (like a chimney) and another integrating into shingle courses for maximum defense against leaks.
The Art of Edge Flashing Installation
Last but not least is edge flashing – focusing on areas where different planes or angles come together on a rooftop. Expert roofing professionals would tell you that getting this part right can mean dodging future disasters brought by pooling water.
To install properly, overlapping pieces are meticulously layered over each other starting from lower points moving upwards toward peak sections ensuring gravity helps rather than hinders when guiding rainfall paths safely away from structural vulnerabilities. Proper installation techniques are crucial here since any gap left unattended could invite trouble during heavy storms or melting snow seasons.
In essence, whether we’re talking about preventing foundation erosion with drip edges or safeguarding against ceiling stains via precise counter-flashing cuts—know-how matters immensely when installing various types effectively so they perform their protective duties flawlessly year-round without fail.
Drip edge, base, and edge flashing aren’t just roofing jargon; they’re vital in keeping water at bay. Each type plays a crucial role – from guiding rain into gutters to sealing around chimneys for leak prevention. Proper installation is key to their effectiveness in protecting your home.
Conclusion
By now, you’ve got the lowdown on the importance of roof flashing. It’s your home’s silent guardian against water damage. You learned about different materials like aluminum, steel, and copper – each with its perks.
From step to counter to apron flashing, you discovered how they shield those vulnerable spots where water likes to sneak in. Remember: a timely replacement can save your roof from future leaks.
Maintenance is key. Vigilantly monitor for deterioration signs to avert escalated complications in the future. And when it comes time for installation or replacement, let professionals handle it for peace of mind.
Keep these insights handy; they’re not just advice—they’re insurance for maintaining a dry and secure home under any sky.